Barn doors are a great addition to any space in your home. Whether it be redesigning your entryway into the kitchen, improving your pantry's functionality, closing up your entertainment center, or just adding an accent piece to your wall, barn doors have a variety of uses.
When brainstorming what type of barn door you want to install, you should also consider the style of sliding barn door hardware. The barn door hardware is an essential aspect of your sliding barn door because it will determine the functionality and overall style of your barn door.
Barn doors are a great way to increase the usable space of any room while providing a clean and unique look. The doors slide side to side, so you can imagine the increased amount of floor space and functionality that can be attained just by transitioning your hinged doors into sliding barn doors.
Different Styles of Barn Doors
There are many different barn doors to choose from, including but not limited to the Z type barn door, double Z, double X, one panel, two panels, plank type, and mid-rail.
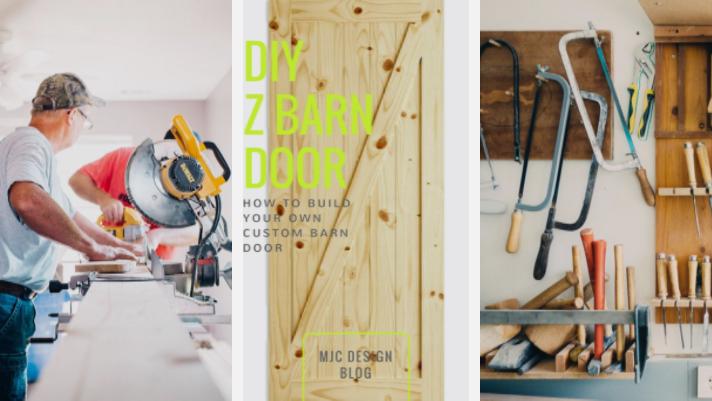
This tutorial is about how to build a Z-Type barn door.
So let's get right into it!
The Z Type Barn Door
This DIY tutorial will cover how to make one of the most popular types of barn doors, the Z Barn Door.
The Z Sliding Barn Door is straightforward to make and required minimal skill or know-how in construction; however, you will need a few tools and materials to complete this tutorial.
The Z door style is a traditional and elegant design with added durability. The Z brace ensures this door will keep its shape and prevent the boards from warping. It's a solid choice for any room and indeed a great option if this is your first time building a door. You can't go wrong with this one.
The Z barn door is a great choice and highly versatile. It provides an easy DIY install and flows seamlessly with many home decor and sliding barn door hardware styles.
Depending on the look you are going for in your space, you can either paint, stain, or add a distressed or whitewash finish. If you're looking for a more modern design, go with a sleek and smooth solid color.
For more traditional or urban decor, try creating a whitewash or dark stain. For a softer look, add a clear coat to preserve the natural wood color.
>> Building Your Barn Door <<
Material List
First thing's first, you need to make a list and prepare all of the materials. Here's the quick and dirty list of tools and material required for this project:
1 X 6 Tongue and Groove Boards for the body of the door (of desired wood type, Pine is a popular choice)
1 X 6 Boards for outer trim pieces
1 X 6 or 1 X 4 board for the inner "Z" brace
Gorilla Wood Glue
Minwax High-Performance Wood Filler
Choice of Paint or Stain
80 Grit Multi-Use Sandpaper
Irwin Quick-Grip Clamp Set
Saw Horses
Miter saw - We recommend DeWalt, but any brand is fine.
Electric Finish Nailer with 1" to 1-1/4" finish nails - (optional, but will speed up the process)
Drill bits with countersink attachment (for pre-drilling screw holes with a clean finish)
Ok, now that you’ve got all the tools and materials needed for the construction of your new Z barn door, it’s time to start the building process.
STEP 1
First, you need to determine the width of your door. After you decide on your door's full width, layout the correct amount of tongue and groove boards; these boards will make up the main body of your door. For a more uniform look, make sure the two outer panels are similar widths.
STEP 2
Next, give the boards a thorough sanding to smooth out all of the rough edges and splinters, as well as to prep the door for you to paint or stain, whichever you prefer.
STEP 3
For this step, you will need your wood glue and clamps. Layout the correct amount of tongue and groove boards that will make up the full width of your interior barn door. Set them on a sturdy, flat table and glue along the entire edge of each board's groove while setting them all in place.
Once you have all of the boards glued and set in place, lay a 2x4 on top of the tongue and groove boards and clamp them down on each end; follow this by clamping the glued tongue and groove boards together on each side. The final result will have a total of 4-6 clamps, 2-3 in each direction.
>> Trimming It Out <<
The trim is what's is going to shape the design of the door. There are so many designs and layouts to consider when adding the frame. In this tutorial, we are discussing the Z barn door.
The outer and inner trim boards utilize the 1 x 6 panels you purchased.
STEP 1
Measure and cut two boards to place on both sides of the long ends and two 1 x 6 boards to fill in the leftover gap in the width. Glue, clamp, and screw these boards down.
You can also use a pneumatic finish nailer to tack the boards down as well. If you don't have one, it's no problem; use small head wood screws or manually hammer in your finish nails. The finish nails are much easier to fill and sand when compared with the screws.
Ensure the outer edge of both boards are flush as you clamp, glue, and screw or nail the perimeter boards.
STEP 2
Place the remaining 1x6 or 1x4 board (your call) diagonally and mark the points where the diagonal board meets the side and top trim pieces, then connect the dots. Use a skill saw, miter saw, or hand saw to make this cut.
Finally, proceed with installing the diagonal board in the same fashion as the outer trim boards.
Pro Tip: make sure you pre-drill the screw holes near the edge of the door to prevent splitting the wood. Also, bury the heads of the screws just below the wood's face to allow for the wood filler.
STEP 3
Apply the wood filler to all screw or nail holes in and lightly sand the door until you achieve a smooth finish throughout and the holes are no longer visible.
STEP 4
Prime and paint your newly constructed Z barn door with the color of your choosing. Let dry for one day before proceeding the installing the barn door hardware hangers.
>> THE BARN DOOR HARDWARE <<
Now that you’ve got your beautiful and fully customized Z barn door finished, it’s time to add the finishing touch by installing a barn door hardware kit that will perfectly complement your entry and décor.
MJC & COMPANY has a great selection of beautifully crafted and timeless sliding barn door hardware. I recommend going with MJC's Vintage or Classic Sliding Barn Door Hardware Kit for the Z barn door style.
Whichever kit you choose, it’s sure to turn out beautiful.
A great benefit of choosing MJC & COMPANY barn door hardware is the lifetime warranty and their exceptional attention to detail.
The Classic style sliding barn door hardware is excellent for the traditionalist or those looking for a classic and elegant design.
This barn door kit integrates seamlessly with many decor types and is a great all-around choice. MJC & Company does a fantastic job assuring all barn door kits are top-notch and even insures each hardware kit with a lifetime warranty.
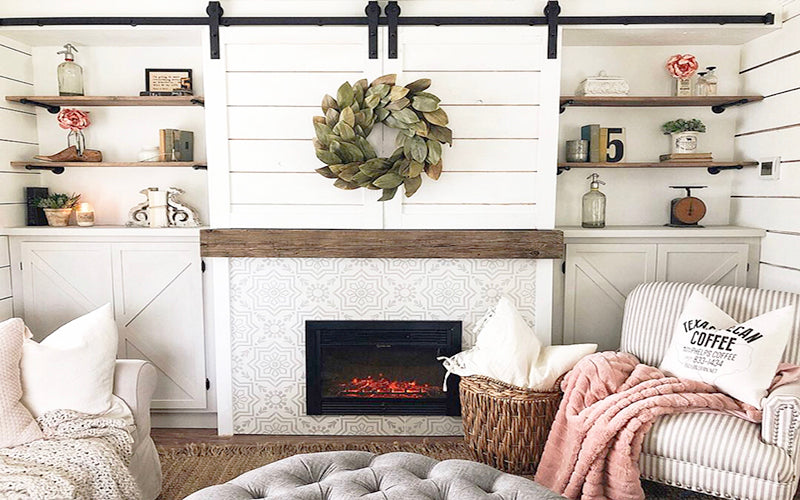
Arguably one of the most popular styles of barn door hardware is the Vintage Strap Design. This style is perfect if you're going for a rustic urban appeal with some industrialized old world charm!
The reclaimed wood barn door in the photo below is a fantastic choice for this type of hardware. The Z barn door can also be built out of reclaimed wood to give it a similar rustic appearance.
This Modern Sliding Barn Door Hardware Kit by MJC & Company is perfect for those looking for a more contemporary, low-profile design. Pair this barn door kit with a solid color door for a sleek and modern appearance.
The low-profile design is also famous for mounting indoor sliding window shutters, closing off large entertainment centers, or adding a touch of character to your nightstand or dresser.
>> The Finishing Touch <<
Once you've gotten your custom sliding barn door built and hung with the proper hardware kit, you'll want a lovely barn door pull to add the final touch. A double-sided barn door pull/flush combo is the way to go.
Even if you don't technically need a pull on the backside (if you're installing on a pantry, for instance), it's still a good idea to go with this option.
The backplate allows for a more sturdy installation since it utilizes a through-bolt that clamps both the back finger pull and front pull handle together. Also, they are super easy to install.
>> HANDLE IDEAS <<
Here are some recommendations of barn door handles from MJC that will work great, regardless of the hardware style chosen:
As you can see, regardless of the sliding door hardware you choose, your new barn door is going to look fantastic! Plus, you are going to feel accomplished that you built it all by yourself. Enjoy!
How-To Video: Barn Door Hardware Kit and Handle Installation Video
MJC & COMPANY Barn Door Hardware Introduction Video
Sweet DIY barn door tutorial. I’m not the best carpenter so this cleared up a few questions I had and helped me decide on what type of barn door to make for my bathroom. Thanks!
Alex
January 05, 2019
Awesome tutorial! What size sliding barn door hardware would you recommend for a door openining measuring 48”?
Also, I’m thinking the Vintage style barn door hardware by MJC & Company may suit my current decor style perfectly!
This blog reveals an easy step-by-step DIY process for installing sliding barn door hardware like a pro. Save a ton of money by doing it yourself and have fun in the process!


James
January 26, 2020
Sweet DIY barn door tutorial. I’m not the best carpenter so this cleared up a few questions I had and helped me decide on what type of barn door to make for my bathroom. Thanks!